VitePress Guide: From Installation to Deployment
Min-jun Kim
Dev Intern · Leapcell

Introduction to VitePress
VitePress is a static site generator (SSG) based on Vite and Vue 3. It converts Markdown files into static HTML, allowing you to build a website quickly.
VitePress is widely used for documentation sites. For example, the official documentation for Vue.js and Vite are both built with VitePress.
In addition to documentation, many people also use VitePress to create personal blogs. Because it transforms Markdown files into web pages, it allows you to focus on content creation without worrying too much about technical details.
How is it different from VuePress?
While there's only a one-letter difference in their names, VuePress and VitePress are quite distinct.
VuePress was an earlier static site generator released by the Vue team, specifically designed for Vue 2.x. In contrast, VitePress is tailor-made for Vue 3.x.
As Vue 3 has become the mainstream, it is now recommended to use the latest version of VitePress to benefit from a more active ecosystem and community support.
Quick Start
Execute the following commands in order to create a new VitePress project:
# Create a new project folder and enter it
mkdir vitepress-blog && cd vitepress-blog

# Add VitePress
npm add -D vitepress@next

# Run the initialization wizard
npx vitepress init
After running the commands above, VitePress will guide you through the basic configuration with a series of questions, such as the location of your content, site title, and theme. For beginners, you can simply press Enter to accept the default options for all questions.
┌  Welcome to VitePress!
│
◇  Where should VitePress initialize the config?
│  ./
│
◇  Where should VitePress look for your markdown files?
│  ./
│
◇  Site title:
│  My Awesome Project
│
◇  Site description:
│  A VitePress Site
│
◇  Theme:
│  Default Theme
│
◇  Use TypeScript for config and theme files?
│  Yes
│
◇  Add VitePress npm scripts to package.json?
│  Yes
│
◇  Add a prefix for VitePress npm scripts?
│  Yes
│
◇  Prefix for VitePress npm scripts:
│  docs
│
└  Done! Now run npm run docs:dev and start writing.
Once the wizard is complete, your project is initialized. Your project directory structure should look something like this:
.
├── .vitepress
│   └── config.mts  # VitePress configuration file
├── api-examples.md
├── markdown-examples.md
├── index.md      # Site homepage
└── package.json
Run the following command to start the development server:
npm run docs:dev
Visit http://localhost:5173 in your browser, and you will see your VitePress site.
Adding Your First Post
Create a new Markdown file in the root directory, for example, my-first-post.md. Write some content in it:
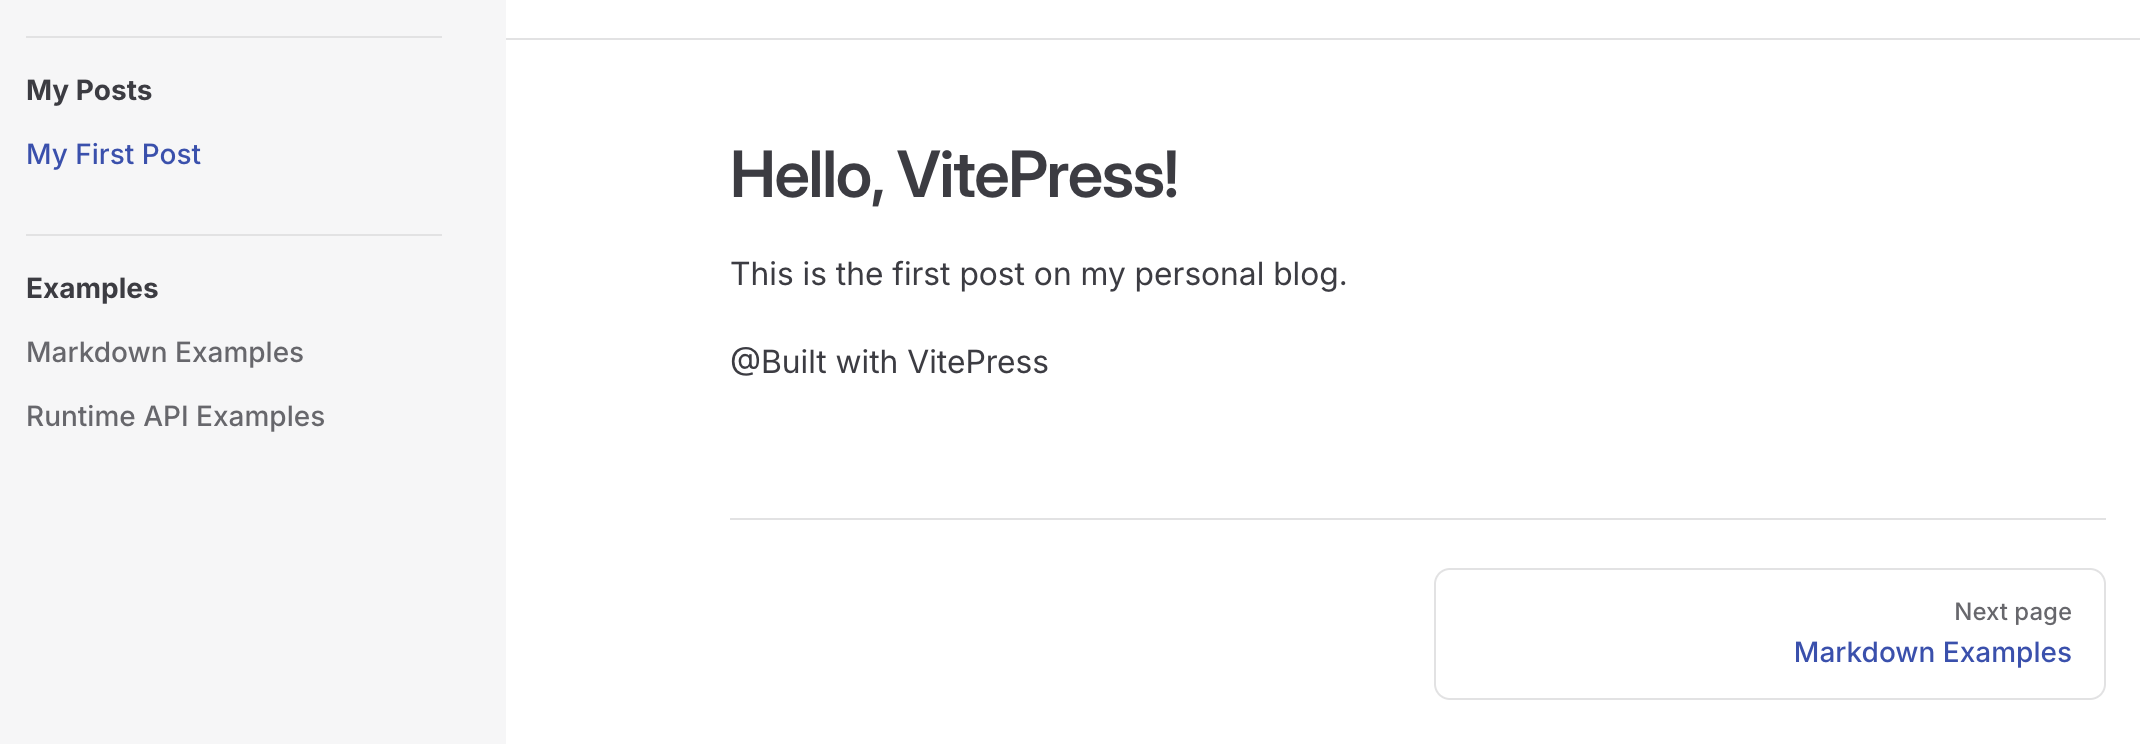
---
title: My First Post
date: 2025-09-21
---

# Hello, VitePress!

This is the first post on my personal blog.

@Built with VitePress
After writing the post, you will notice that it doesn't appear on your site. This is because VitePress does not automatically detect file changes to update the navigation. You need to manually update the configuration file to add the post to VitePress.
Open the .vitepress/config.mts file, find the sidebar configuration option, and add your new post:
import { defineConfig } from 'vitepress';

export default defineConfig({
  // ... other configurations
  themeConfig: {
    // ... other theme configurations
    sidebar: [
      {
        text: 'My Posts', // This is a group title
        items: [{ text: 'My First Post', link: '/my-first-post' }],
      },
    ],
  },
});
After saving the file, refresh the browser page. You will see the link to your post in the sidebar. Click it to view your new post.
Is there a way to automatically update the sidebar?
Manually updating the sidebar every time you create a new post can be tedious. However, there is currently no built-in automation solution provided by the official team.
You can use community plugins to solve this problem, such as VitePress Sidebar.
How to Modify the Homepage?
The default homepage is located at index.md. However, its content looks rather strange: it seems to consist only of a set of configurations, with no Markdown or HTML.
How does a block of configuration turn into an entire webpage?
The homepage is actually generated by the VitePress theme. The site we created using the default configuration also includes a theme.
When you specify layout: home in the Frontmatter (the configuration area at the top of the file) of index.md, VitePress uses the theme's built-in homepage template to render the page. The title, tagline, buttons, and other content required by the template are all sourced from the hero, actions, and other fields you configure in index.md.
The most direct way to change the homepage's style is to change or customize the site's theme.
You can either rewrite the homepage completely or use a theme provided by the community. You can find many community themes in "awesome lists" like Awesome VitePress.
How to Further Enrich Your Blog?
Once you have the basic framework set up, you can take your learning further to make your blog richer and more personalized in the following ways:
- Learn Vue.js: By learning Vue, you can create custom components within your Markdown files to enrich your web content, such as charts, carousels, or even more complex applications.
- Dive into the VitePress Documentation: Spend time reading the official documentation to learn how to configure the navigation bar, footer, internationalization (i18n), and how to take full advantage of the built-in Markdown extensions.
- Explore Community Themes and Plugins: By using themes and plugins contributed by community developers, such as those found in Awesome VitePress, you can quickly add advanced features and styles to your blog.
Deploying Your VitePress Website
Now that your blog is set up, it's time to deploy it online to share with friends and the world.
It is recommended to use Leapcell for deployment.

Leapcell is a web app hosting platform that provides an extremely simple and easy-to-use interface, allowing you to deploy your VitePress site online in just a few simple steps.
Additionally, Leapcell has a built-in Traffic Analytics feature, which makes it very convenient to see your website's access information, such as user visit frequency and user sources, helping you understand your readers better.

Specific Deployment Steps
-
In the project's root directory, create a file named
Caddyfilewith the following content::8080 { root * ./.vitepress/dist file_server } -
Next, create a
.gitignorefile in the root directory and add the following content:node_modules .vitepress/cache .vitepress/dist -
Commit your project to GitHub. You can refer to GitHub's official documentation for the steps. Leapcell will pull the code from your GitHub repository later.
-
Click "Create Service" on the Leapcell page.

-
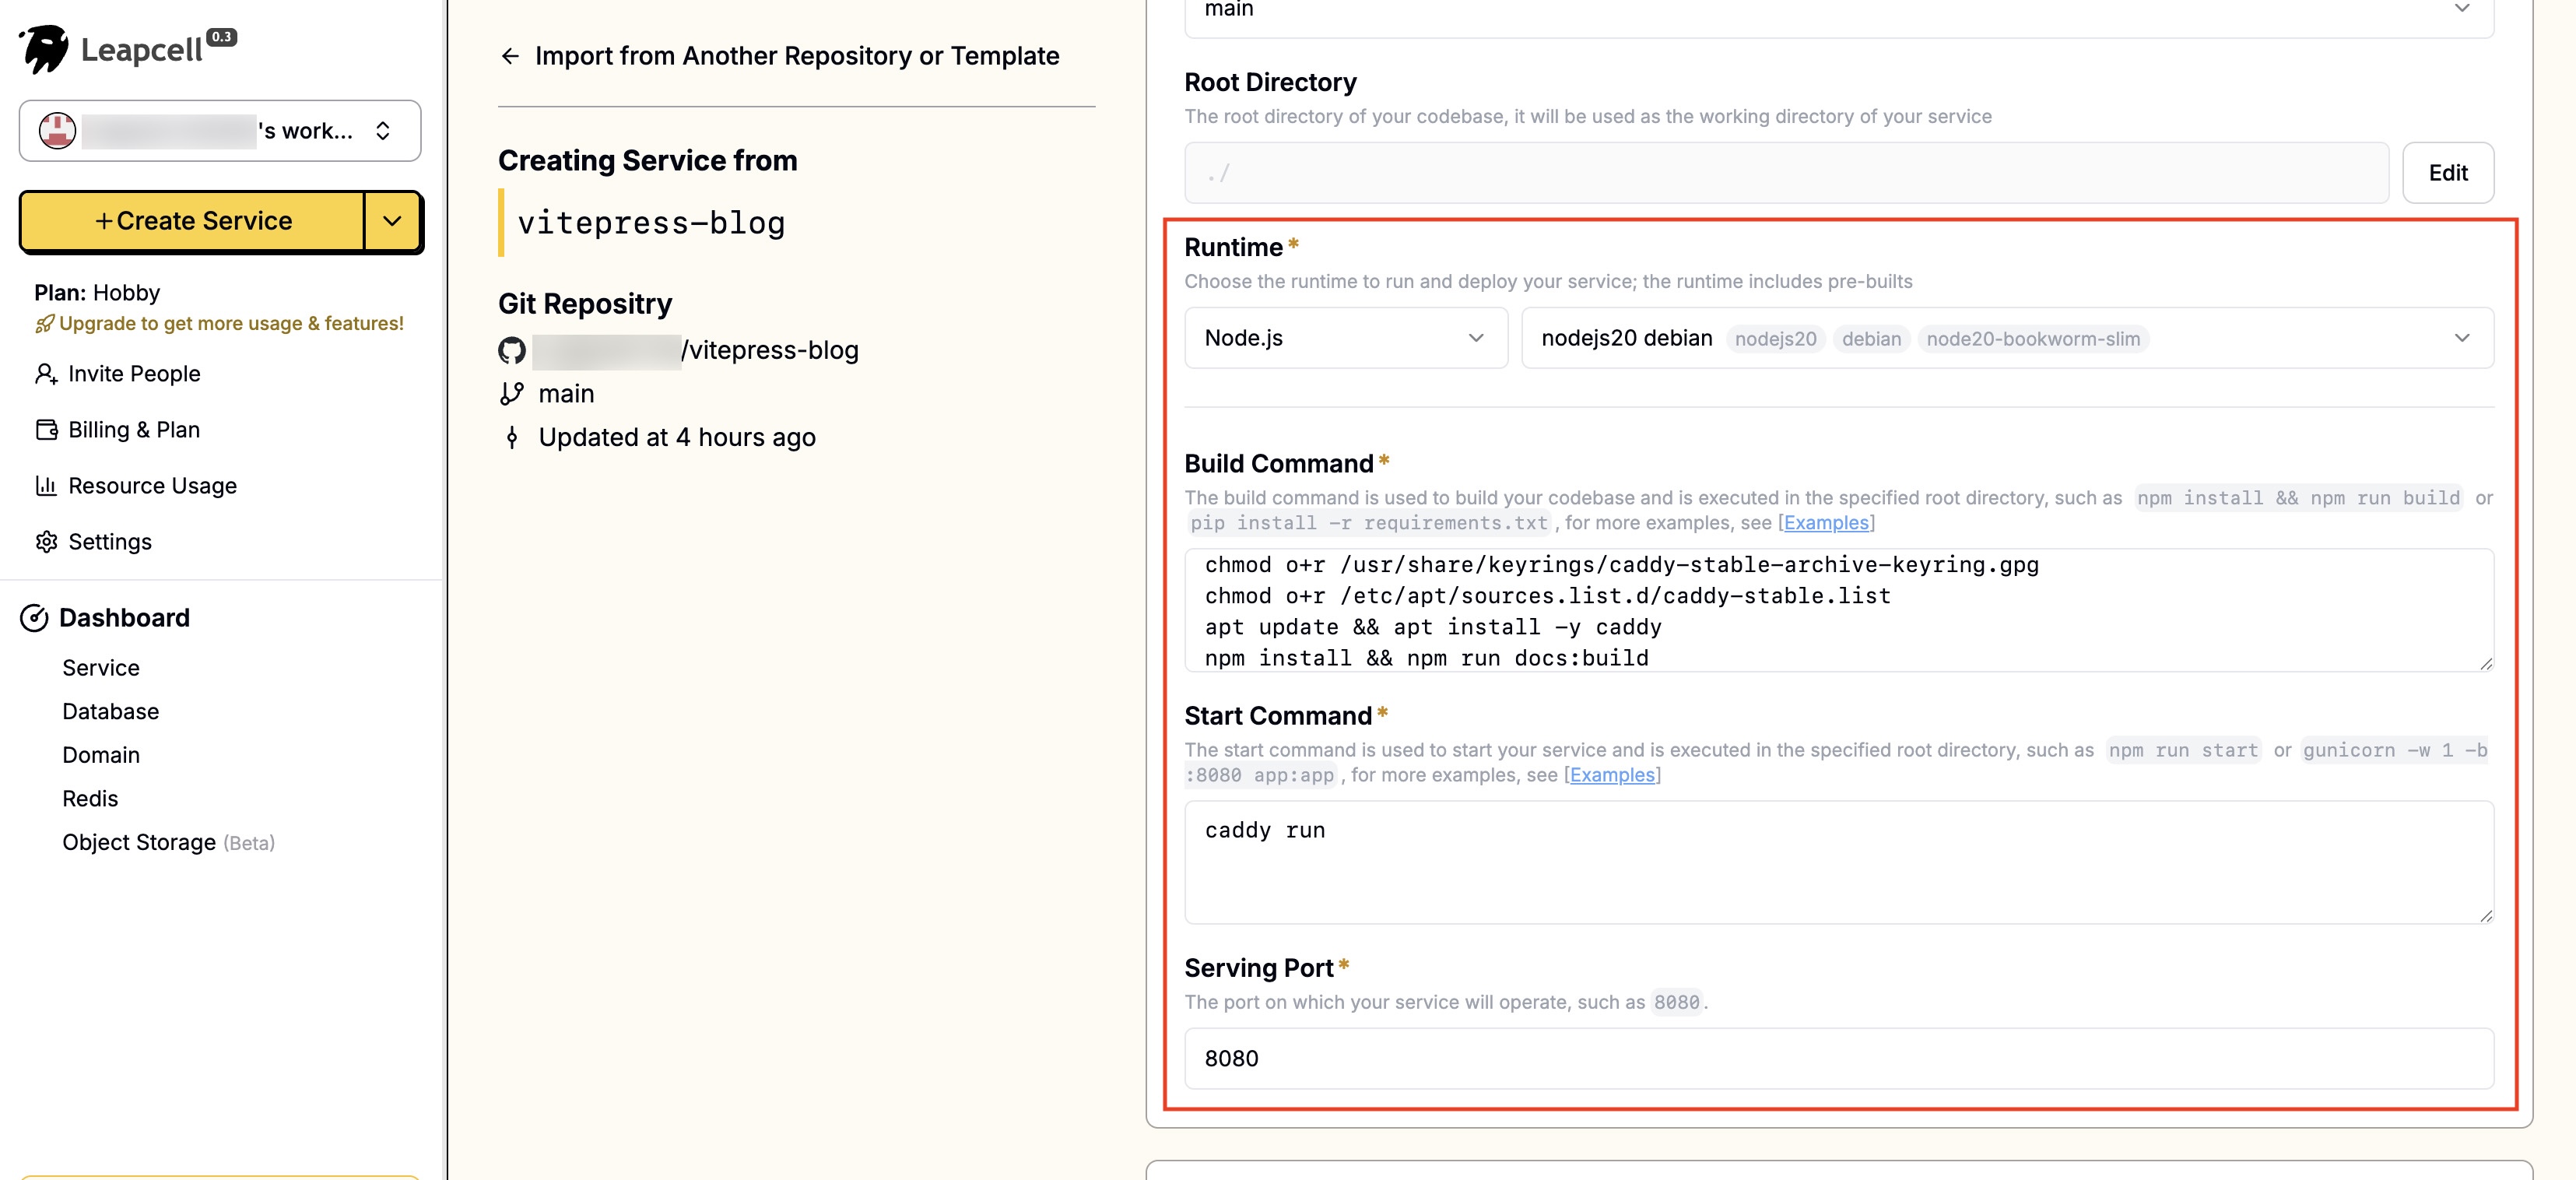
Choose "nodejs20" as the runtime, and fill these deployment fields:
Build Command:
apt update && apt install -y debian-keyring debian-archive-keyring apt-transport-https curl
curl -1sLf 'https://dl.cloudsmith.io/public/caddy/stable/gpg.key' | gpg --dearmor -o /usr/share/keyrings/caddy-stable-archive-keyring.gpg
curl -1sLf 'https://dl.cloudsmith.io/public/caddy/stable/debian.deb.txt' | tee /etc/apt/sources.list.d/caddy-stable.list
chmod o+r /usr/share/keyrings/caddy-stable-archive-keyring.gpg
chmod o+r /etc/apt/sources.list.d/caddy-stable.list
apt update && apt install -y caddy

npm install && npm run docs:build
Start Command:
caddy runPort: 8080
-
Click "Submit" at the bottom to deploy. The deployment will complete quickly and return you to the deployment homepage. Here we can see that Leapcell has provided a domain. This is the online address of your blog.
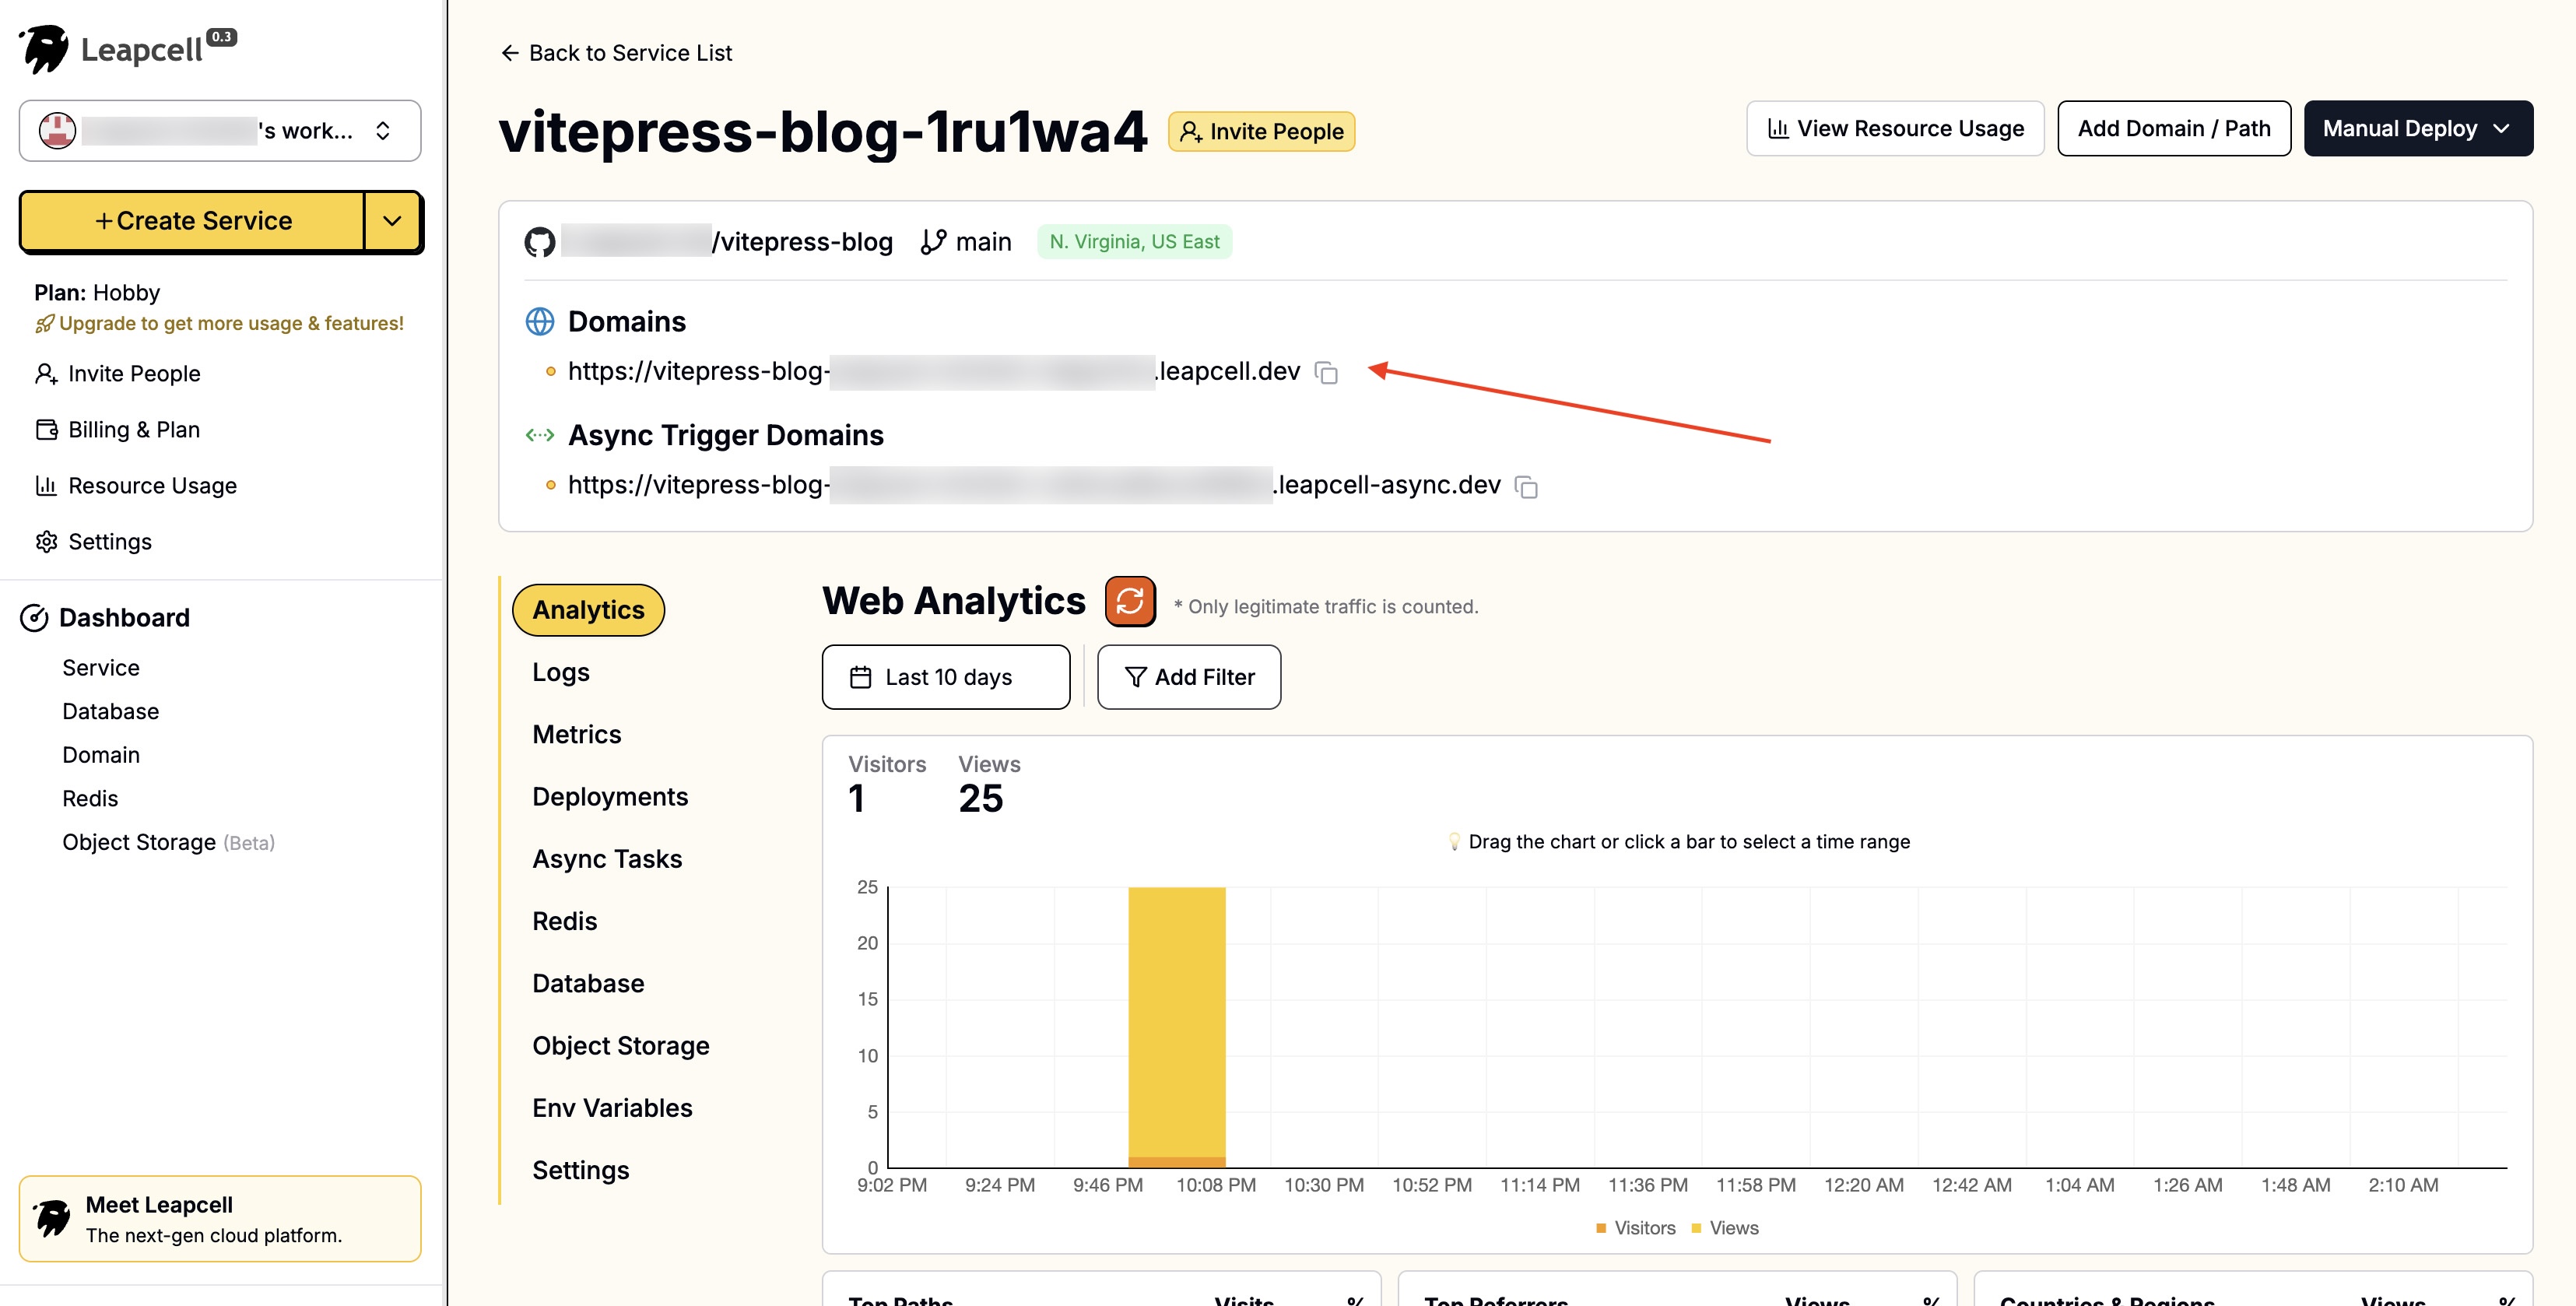
Now you have a blog that can be accessed online. Go ahead and show it to your friends!