Build a Great Nest.js Blog: Add Authorization
Takashi Yamamoto
Infrastructure Engineer · Leapcell

In the previous tutorial, we successfully built a user registration system and basic login validation logic. Users can create accounts, and the application can verify their usernames and passwords.
However, the current login is a one-time event; the server doesn't remember the user's login state. Every time the page is refreshed, the user reverts to being a guest.
In this article, we will use express-session to implement true user login state management for our blog, protecting pages and features that require a login and dynamically updating the interface based on the user's login status.
Configure Session
To handle session management, we will use express-session, a very popular library in the Express ecosystem. Since Nest.js uses Express under the hood by default, we can integrate it directly.
Install the necessary dependencies:
npm install express-session
npm install -D @types/express-session
Use Redis to Store Sessions
By default, express-session stores sessions in the server's memory. This means that if the server restarts, all users' login states will be lost. To solve this, we will use Redis, a high-performance in-memory database, to persist sessions.
What if you don't have Redis?
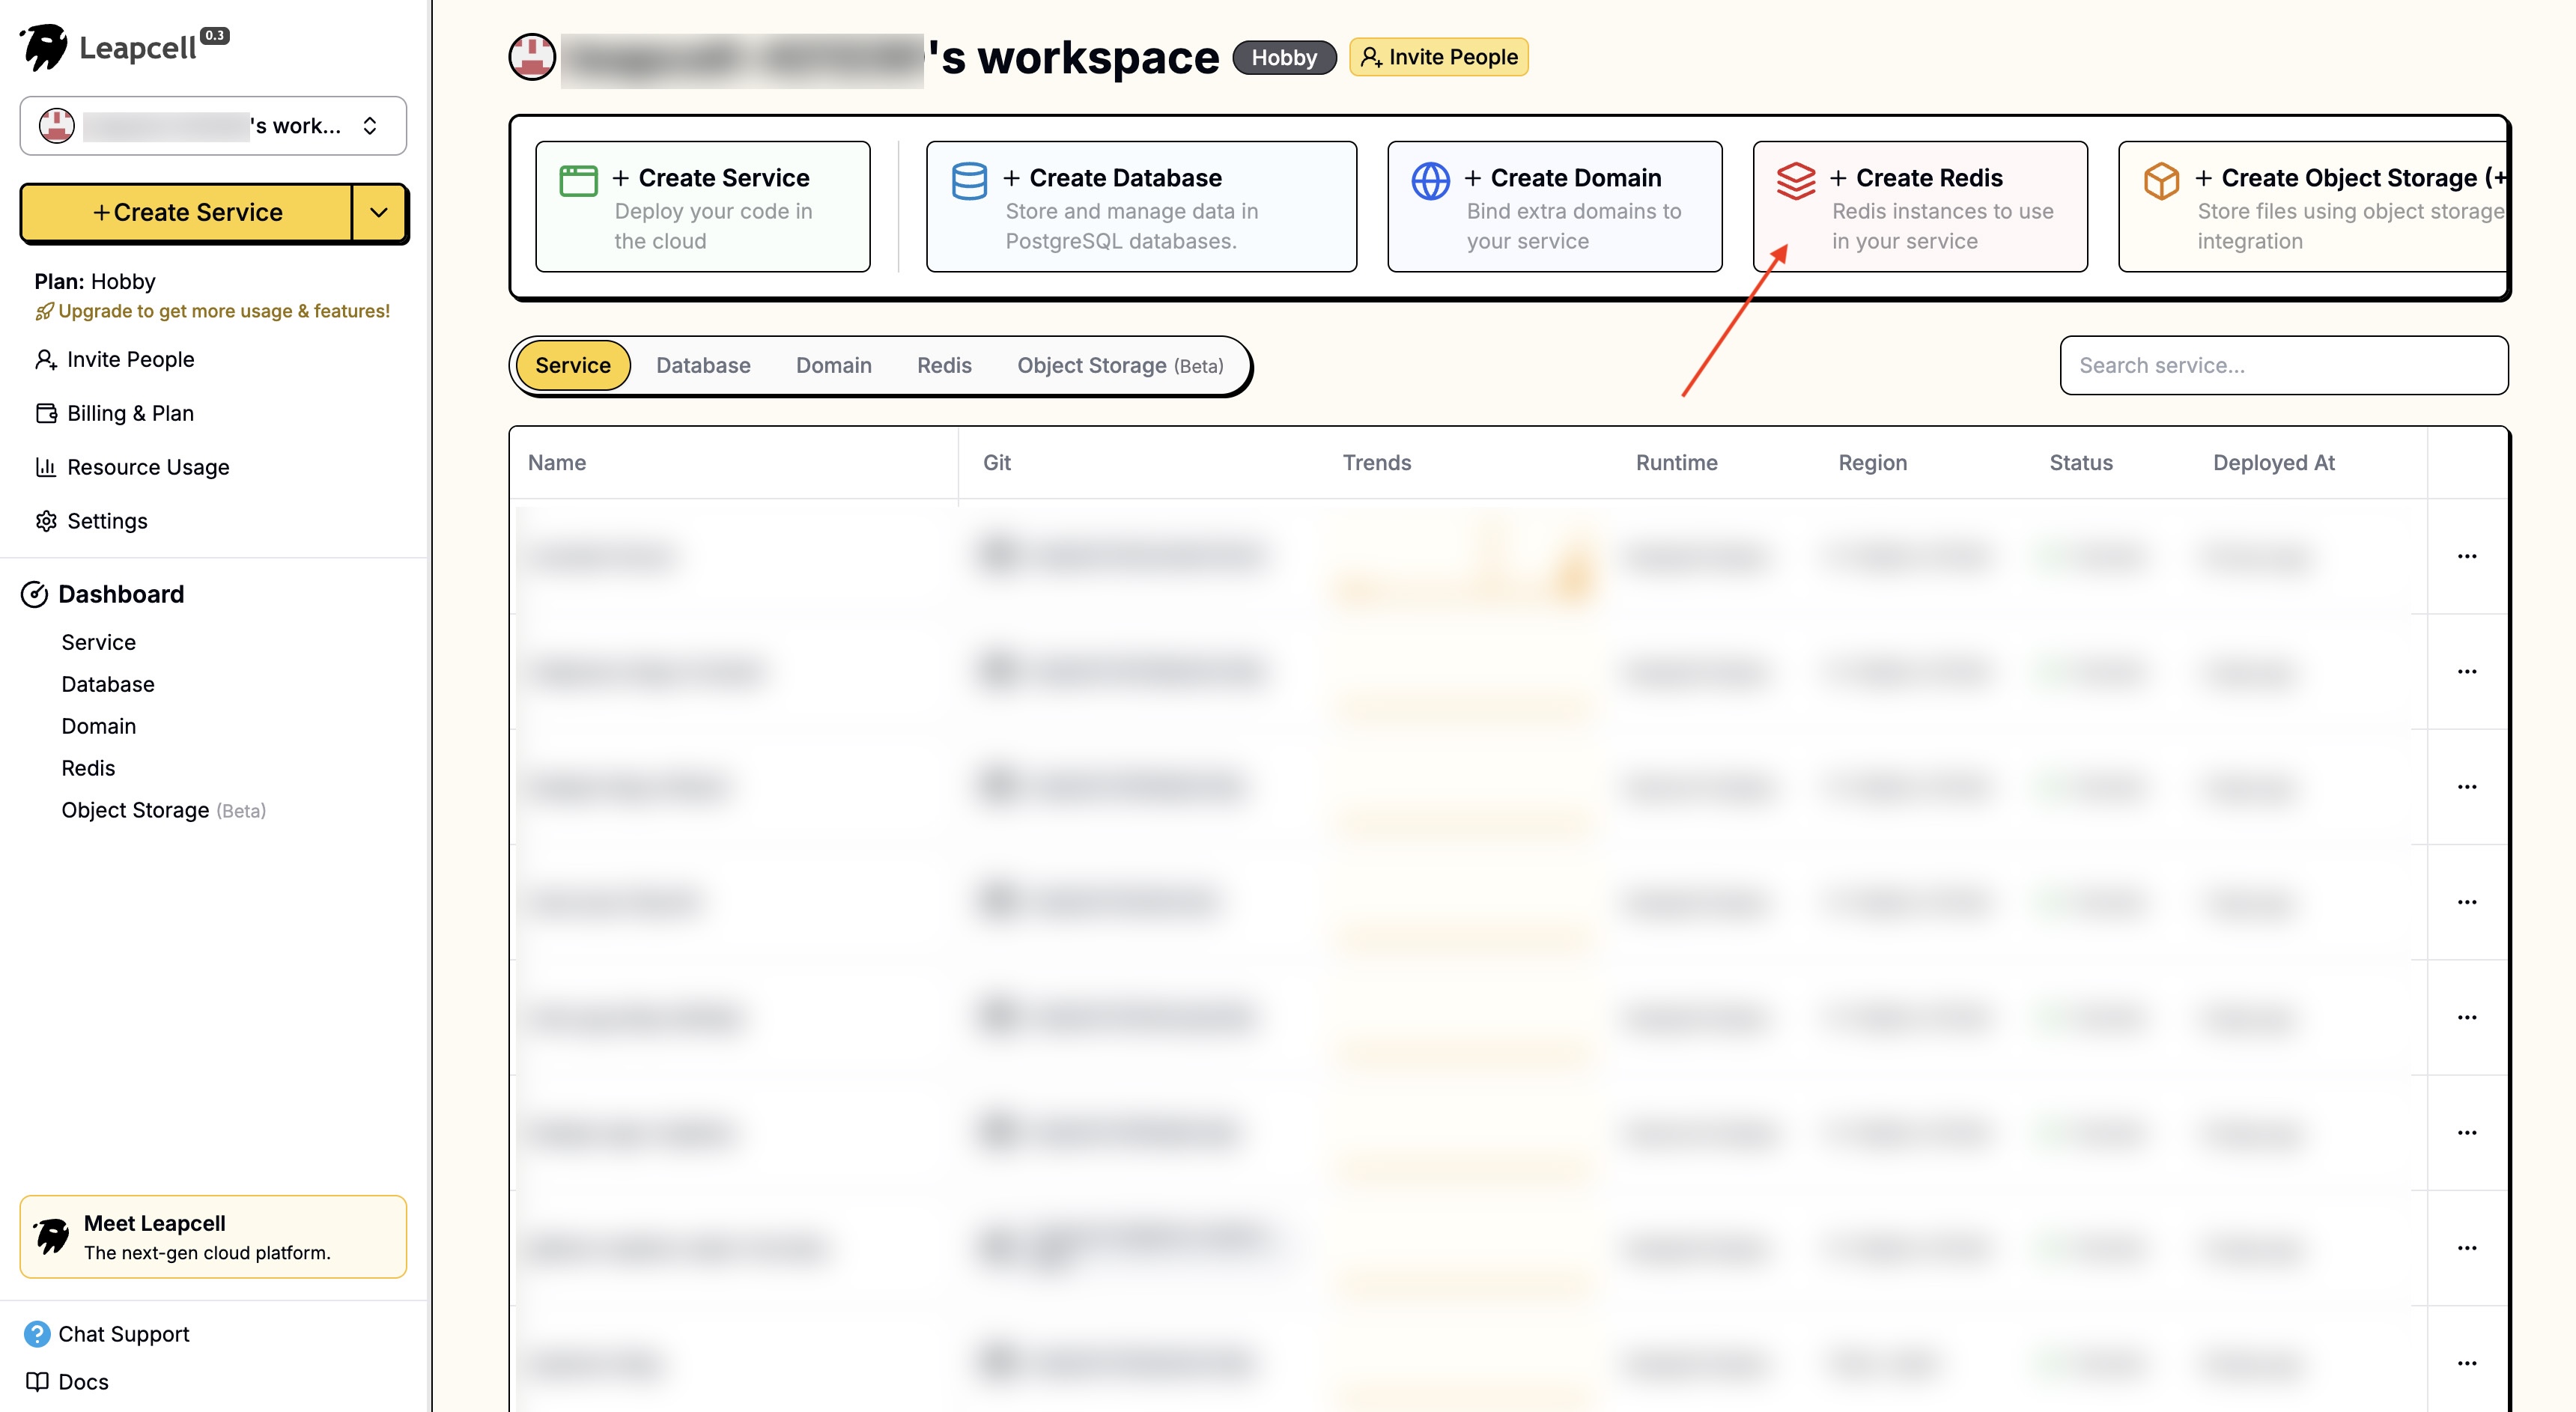
You can create a Redis instance on Leapcell. Leapcell provides most of the tools a backend application needs!
Click the "Create Redis" button in the interface to create a new Redis instance.
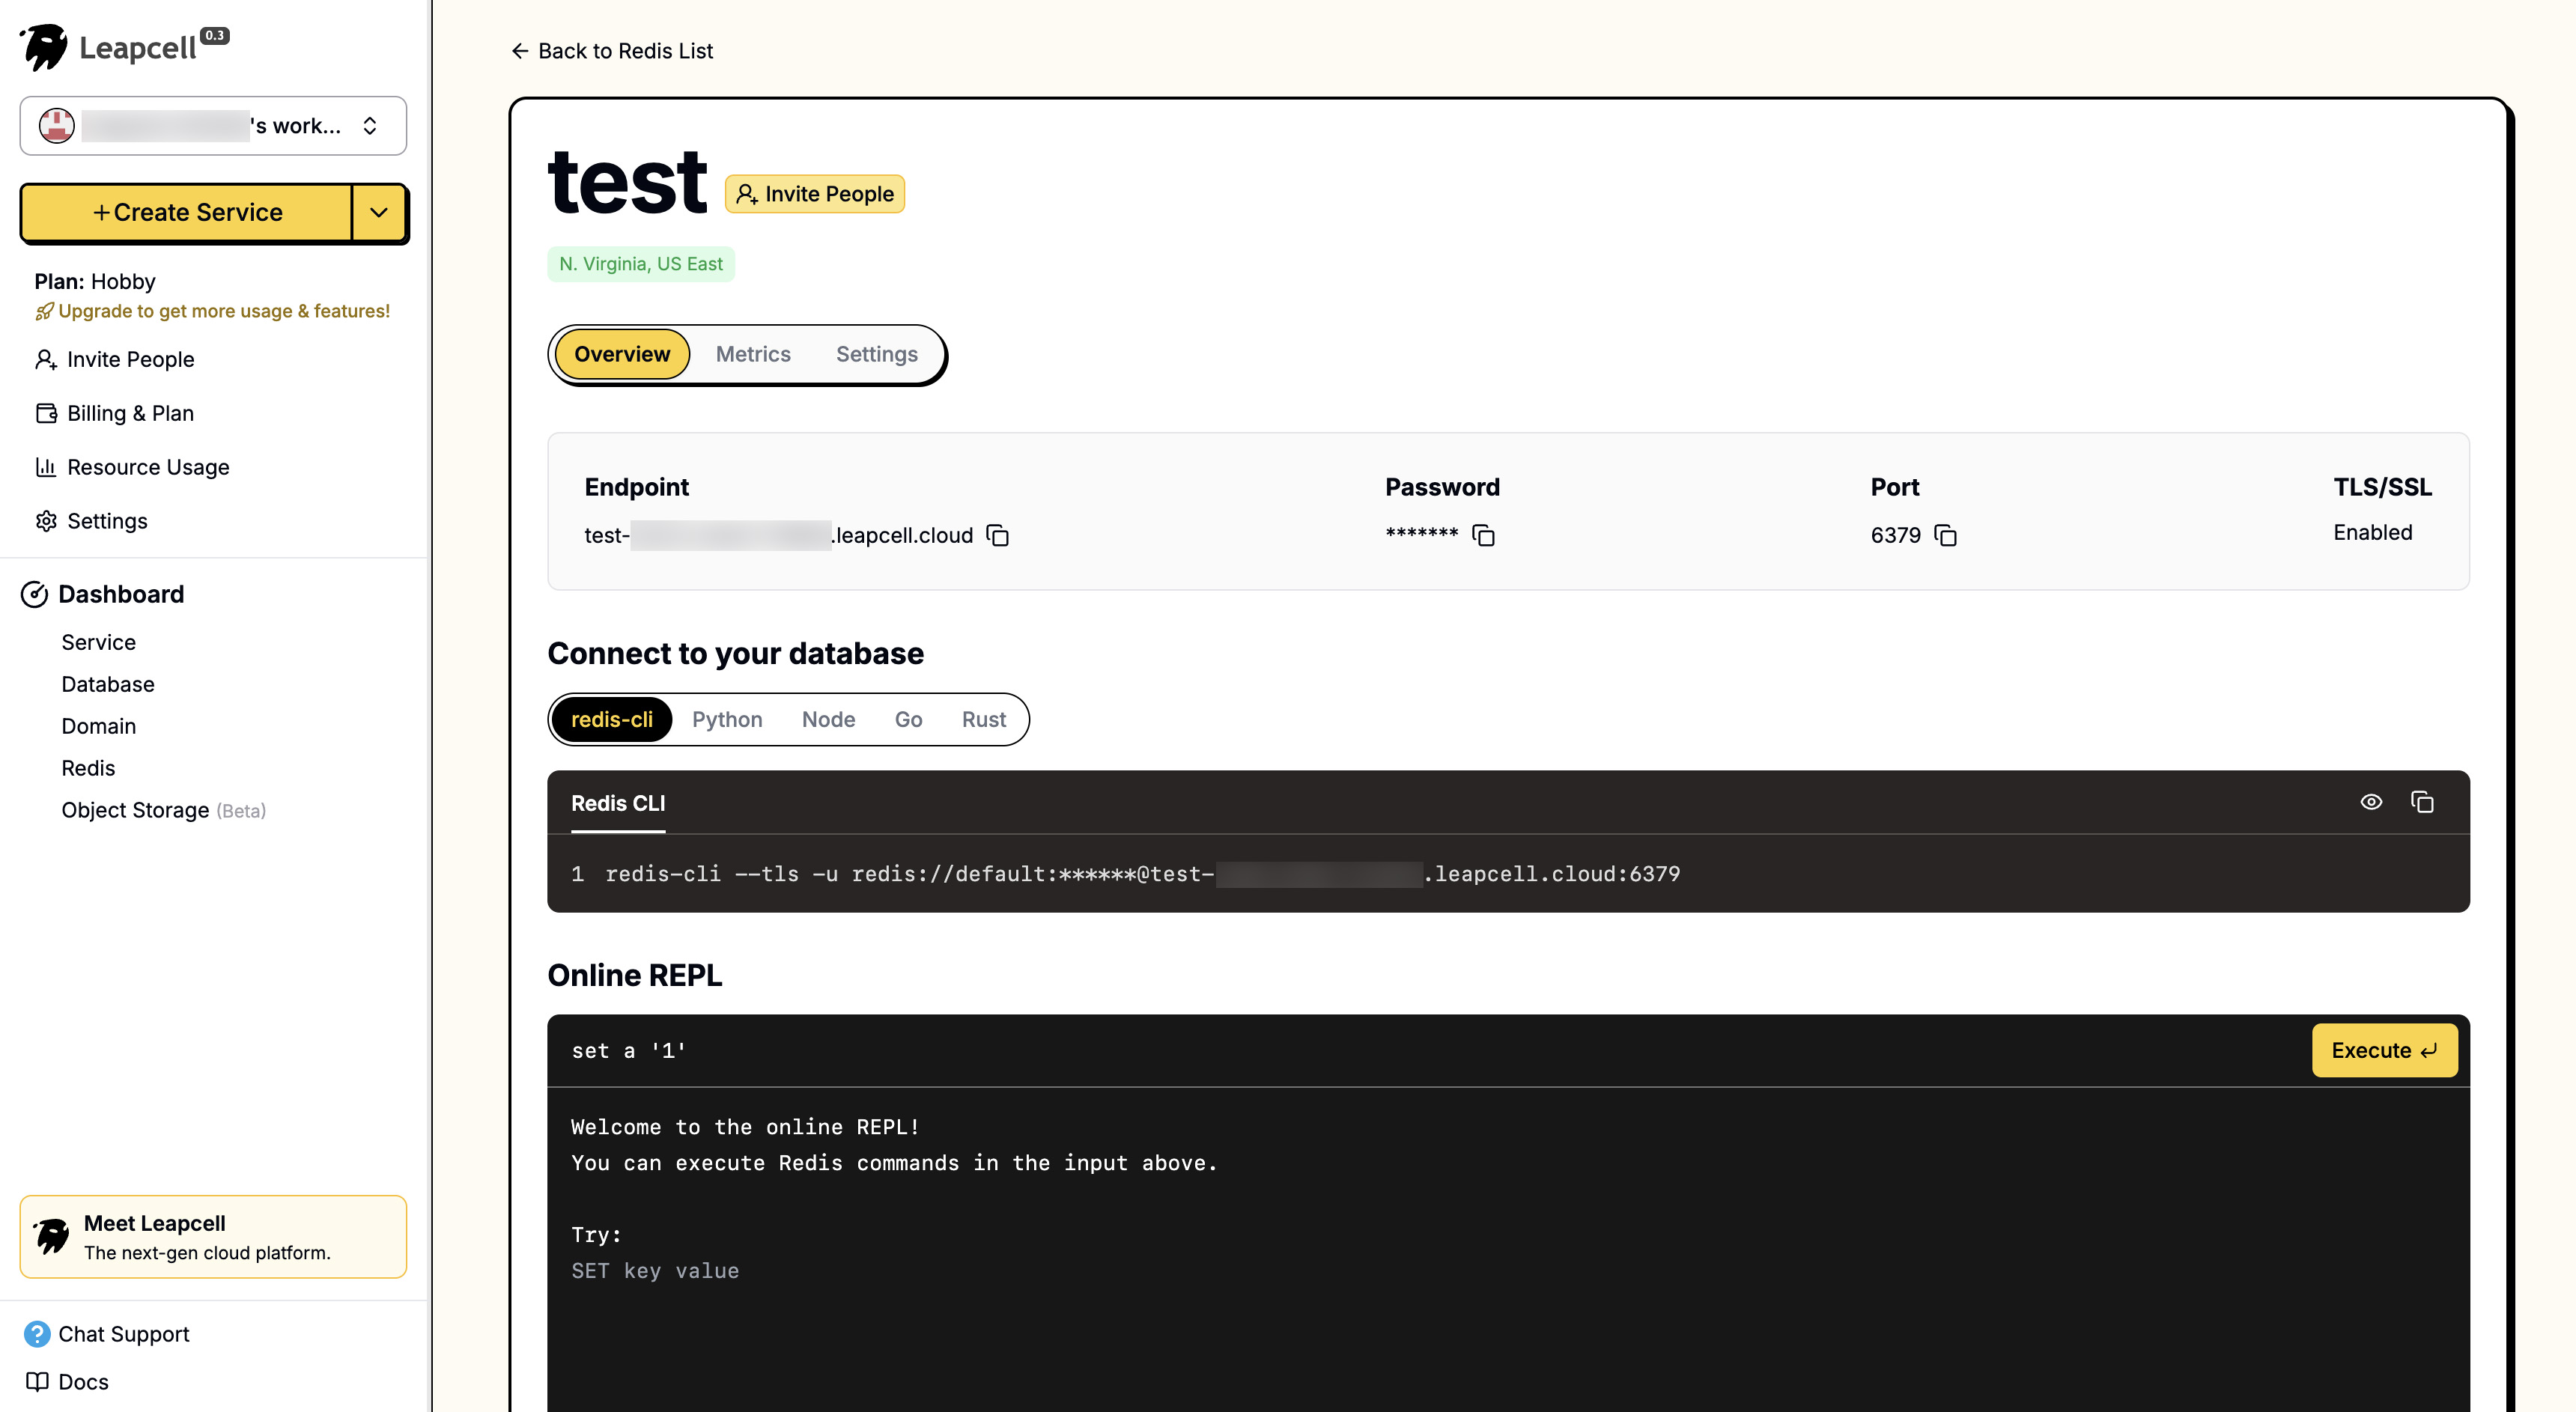
The Redis details page provides an online CLI where you can execute Redis commands directly.
If you absolutely don't have a Redis service available, express-session will automatically fall back to using in-memory storage. However, this is not a best practice for production environments and can lead to potential issues.
Install the Redis-related dependencies:
npm install redis connect-redis
Now, open the src/main.ts file to configure the session middleware and connect to Redis.
// src/main.ts
import { NestFactory } from '@nestjs/core';
import { AppModule } from './app.module';
import { NestExpressApplication } from '@nestjs/platform-express';
import { join } from 'path';
import session from 'express-session';
import { createClient } from 'redis';
import { RedisStore } from 'connect-redis';

async function bootstrap() {
  const app = await NestFactory.create<NestExpressApplication>(AppModule);

  // Initialize the Redis Client
  const redisClient = createClient({
    // If your Redis has a password or is on another host, modify the configuration here
    // url: 'redis://:password@hostname:port'
    url: 'redis://localhost:6379',
  });
  await redisClient.connect().catch(console.error);

  // Initialize RedisStore
  const redisStore = new RedisStore({
    client: redisClient,
    prefix: 'blog-session:',
  });

  app.use(
    session({
      store: redisStore, // Use Redis for storage
      secret: 'your-secret-key', // Replace with a random, complex string
      resave: false,
      saveUninitialized: false,
      cookie: {
        httpOnly: true,
        maxAge: 1000 * 60 * 60 * 24 * 7, // 7 days
      },
    })
  );

  app.useStaticAssets(join(__dirname, '..', 'public'));
  app.setBaseViewsDir(join(__dirname, '..', 'views'));
  app.setViewEngine('ejs');

  await app.listen(3000);
}
bootstrap();
Once configured, the express-session middleware will automatically handle each request, parsing the cookie and attaching the corresponding session data to the request.session object.
Implement Real Login and Logout Routes
With the project configuration complete, let's update auth.controller.ts to handle the login and logout logic.
// src/auth/auth.controller.ts
import { Controller, Get, Post, Render, Body, Request, Res, UnauthorizedException } from '@nestjs/common';
import { AuthService } from './auth.service';
import { Response } from 'express';

@Controller('auth')
export class AuthController {
  constructor(private authService: AuthService) {}

  @Get('login')
  @Render('login')
  showLoginForm() {
    return;
  }

  @Post('login')
  async login(@Request() req, @Body() body, @Res() res: Response) {
    const user = await this.authService.validateUser(body.username, body.password);
    if (!user) {
      throw new UnauthorizedException('Invalid credentials');
    }

    // On successful validation, manually record user information in the session
    req.session.user = { id: user.id, username: user.username };

    res.redirect('/posts');
  }

  @Get('logout')
  logout(@Request() req, @Res() res: Response) {
    // Call session.destroy() to clear the session
    req.session.destroy((err) => {
      if (err) {
        console.log(err);
      }
      res.redirect('/'); // Redirect to the homepage after logout
    });
  }
}
In the login method, we validate the user's login credentials.
Upon successful validation, we store an object containing basic user information in req.session.user. express-session will automatically save this session to Redis and set a cookie in the browser containing the Session ID.
Based on the cookie mechanism, the browser will automatically carry this cookie in subsequent requests. The server extracts the Session ID from it, thereby recognizing the user's login state.
In the logout method, we call req.session.destroy(), which deletes the session from Redis, thus logging the user out.
Protect Routes and Update the UI
Now that we have a login mechanism, the final step is to use it to protect our "Create Post" feature and display a different UI based on the login state.
Create an Authentication Guard
A Guard is a class in Nest.js that determines whether a request should be handled. We will create an AuthenticatedGuard to check if a user is logged in.
Create authenticated.guard.ts in the src/auth directory:
// src/auth/authenticated.guard.ts
import { CanActivate, ExecutionContext, Injectable } from '@nestjs/common';

@Injectable()
export class AuthenticatedGuard implements CanActivate {
  async canActivate(context: ExecutionContext): Promise<boolean> {
    const request = context.switchToHttp().getRequest();
    // Check if a user object exists in the session
    return Boolean(request.session.user);
  }
}
The logic of this guard is very simple: if request.session.user exists, it means the user is logged in, and it returns true, allowing the request to proceed. Otherwise, it returns false, and Nest.js will automatically reject the request.
Apply the Guard
Open src/posts/posts.controller.ts and apply the @UseGuards(AuthenticatedGuard) decorator to the routes that need protection.
// src/posts/posts.controller.ts
import { Controller, Get, Render, Post, Body, Res, UseGuards, Param } from '@nestjs/common';
import { AuthenticatedGuard } from '../auth/authenticated.guard'; // The path may need to be adjusted
import { PostsService } from './posts.service';
import type { Response } from 'express';

@Controller('posts')
export class PostsController {
  constructor(private readonly postsService: PostsService) {}

  // ... findAll() and findOne()

  @UseGuards(AuthenticatedGuard) // <--- Apply the guard
  @Get('new')
  @Render('new-post')
  newPostForm() {
    return;
  }

  @UseGuards(AuthenticatedGuard) // <--- Apply the guard
  @Post()
  async create(@Body() body: { title: string; content: string }, @Res() res: Response) {
    await this.postsService.create(body);
    res.redirect('/posts');
  }

  // ...
}
Now, if a non-logged-in user tries to access /posts/new, they will be automatically intercepted (by default, receiving a 403 Forbidden error).
Update the Frontend UI
Finally, let's update the UI to show different buttons based on the user's login status. We need to pass the user's login state (req.session.user) to the frontend when rendering the web templates.
Modify views/_header.ejs to add links for login/register and logout/new post.
<!DOCTYPE html>
<html lang="en">
  <head>
    <meta charset="UTF-8" />
    <meta name="viewport" content="width=device-width, initial-scale=1.0" />
    <title><%= title %></title>
    <link rel="stylesheet" href="/css/style.css" />
  </head>
  <body>
    <header>
      <h1><a href="/">My Blog</a></h1>
      <div class="user-actions">
        <% if (user) { %>
        <span>Welcome, <%= user.username %></span>
        <a href="/posts/new" class="new-post-btn">New Post</a>
        <a href="/auth/logout">Logout</a>
        <% } else { %>
        <a href="/auth/login">Login</a>
        <a href="/users/register">Register</a>
        <% } %>
      </div>
    </header>
    <main>
For the above code to work, we need to update our controllers to pass the user information to the views.
In posts.controller.ts, modify all methods that render views:
// src/posts/posts.controller.ts
import { Controller, Get, Render, Param, /*...,*/ Request } from '@nestjs/common';
// ...

@Controller('posts')
export class PostsController {
  // ...

  @Get()
  @Render('index')
  async root(@Request() req) {
    const posts = await this.postsService.findAll();
    return { posts, user: req.session.user }; // Pass the user from the session to the template
  }

  @UseGuards(AuthenticatedGuard)
  @Get('new')
  @Render('new-post')
  newPostForm(@Request() req) {
    return { user: req.session.user }; // Pass the user from the session to the template
  }

  // ...

  @Get(':id')
  @Render('post')
  async findOne(@Param('id') id: string, @Request() req) {
    const post = await this.postsService.findOne(id);
    return { post, user: req.session.user }; // Pass the user from the session to the template
  }
}
Other controllers that rely on views/_header.ejs, such as auth.controller.ts and users.controller.ts, will need the same adjustment.
Run and Test
Now, restart your application:
npm run start:dev
Visit http://localhost:3000.
You will see "Login" and "Register" buttons in the top right corner. Register an account and log in.
After a successful login, you will be redirected to the homepage, and you will see "Welcome, [your username]", "New Post", and "Logout" buttons in the top right corner.
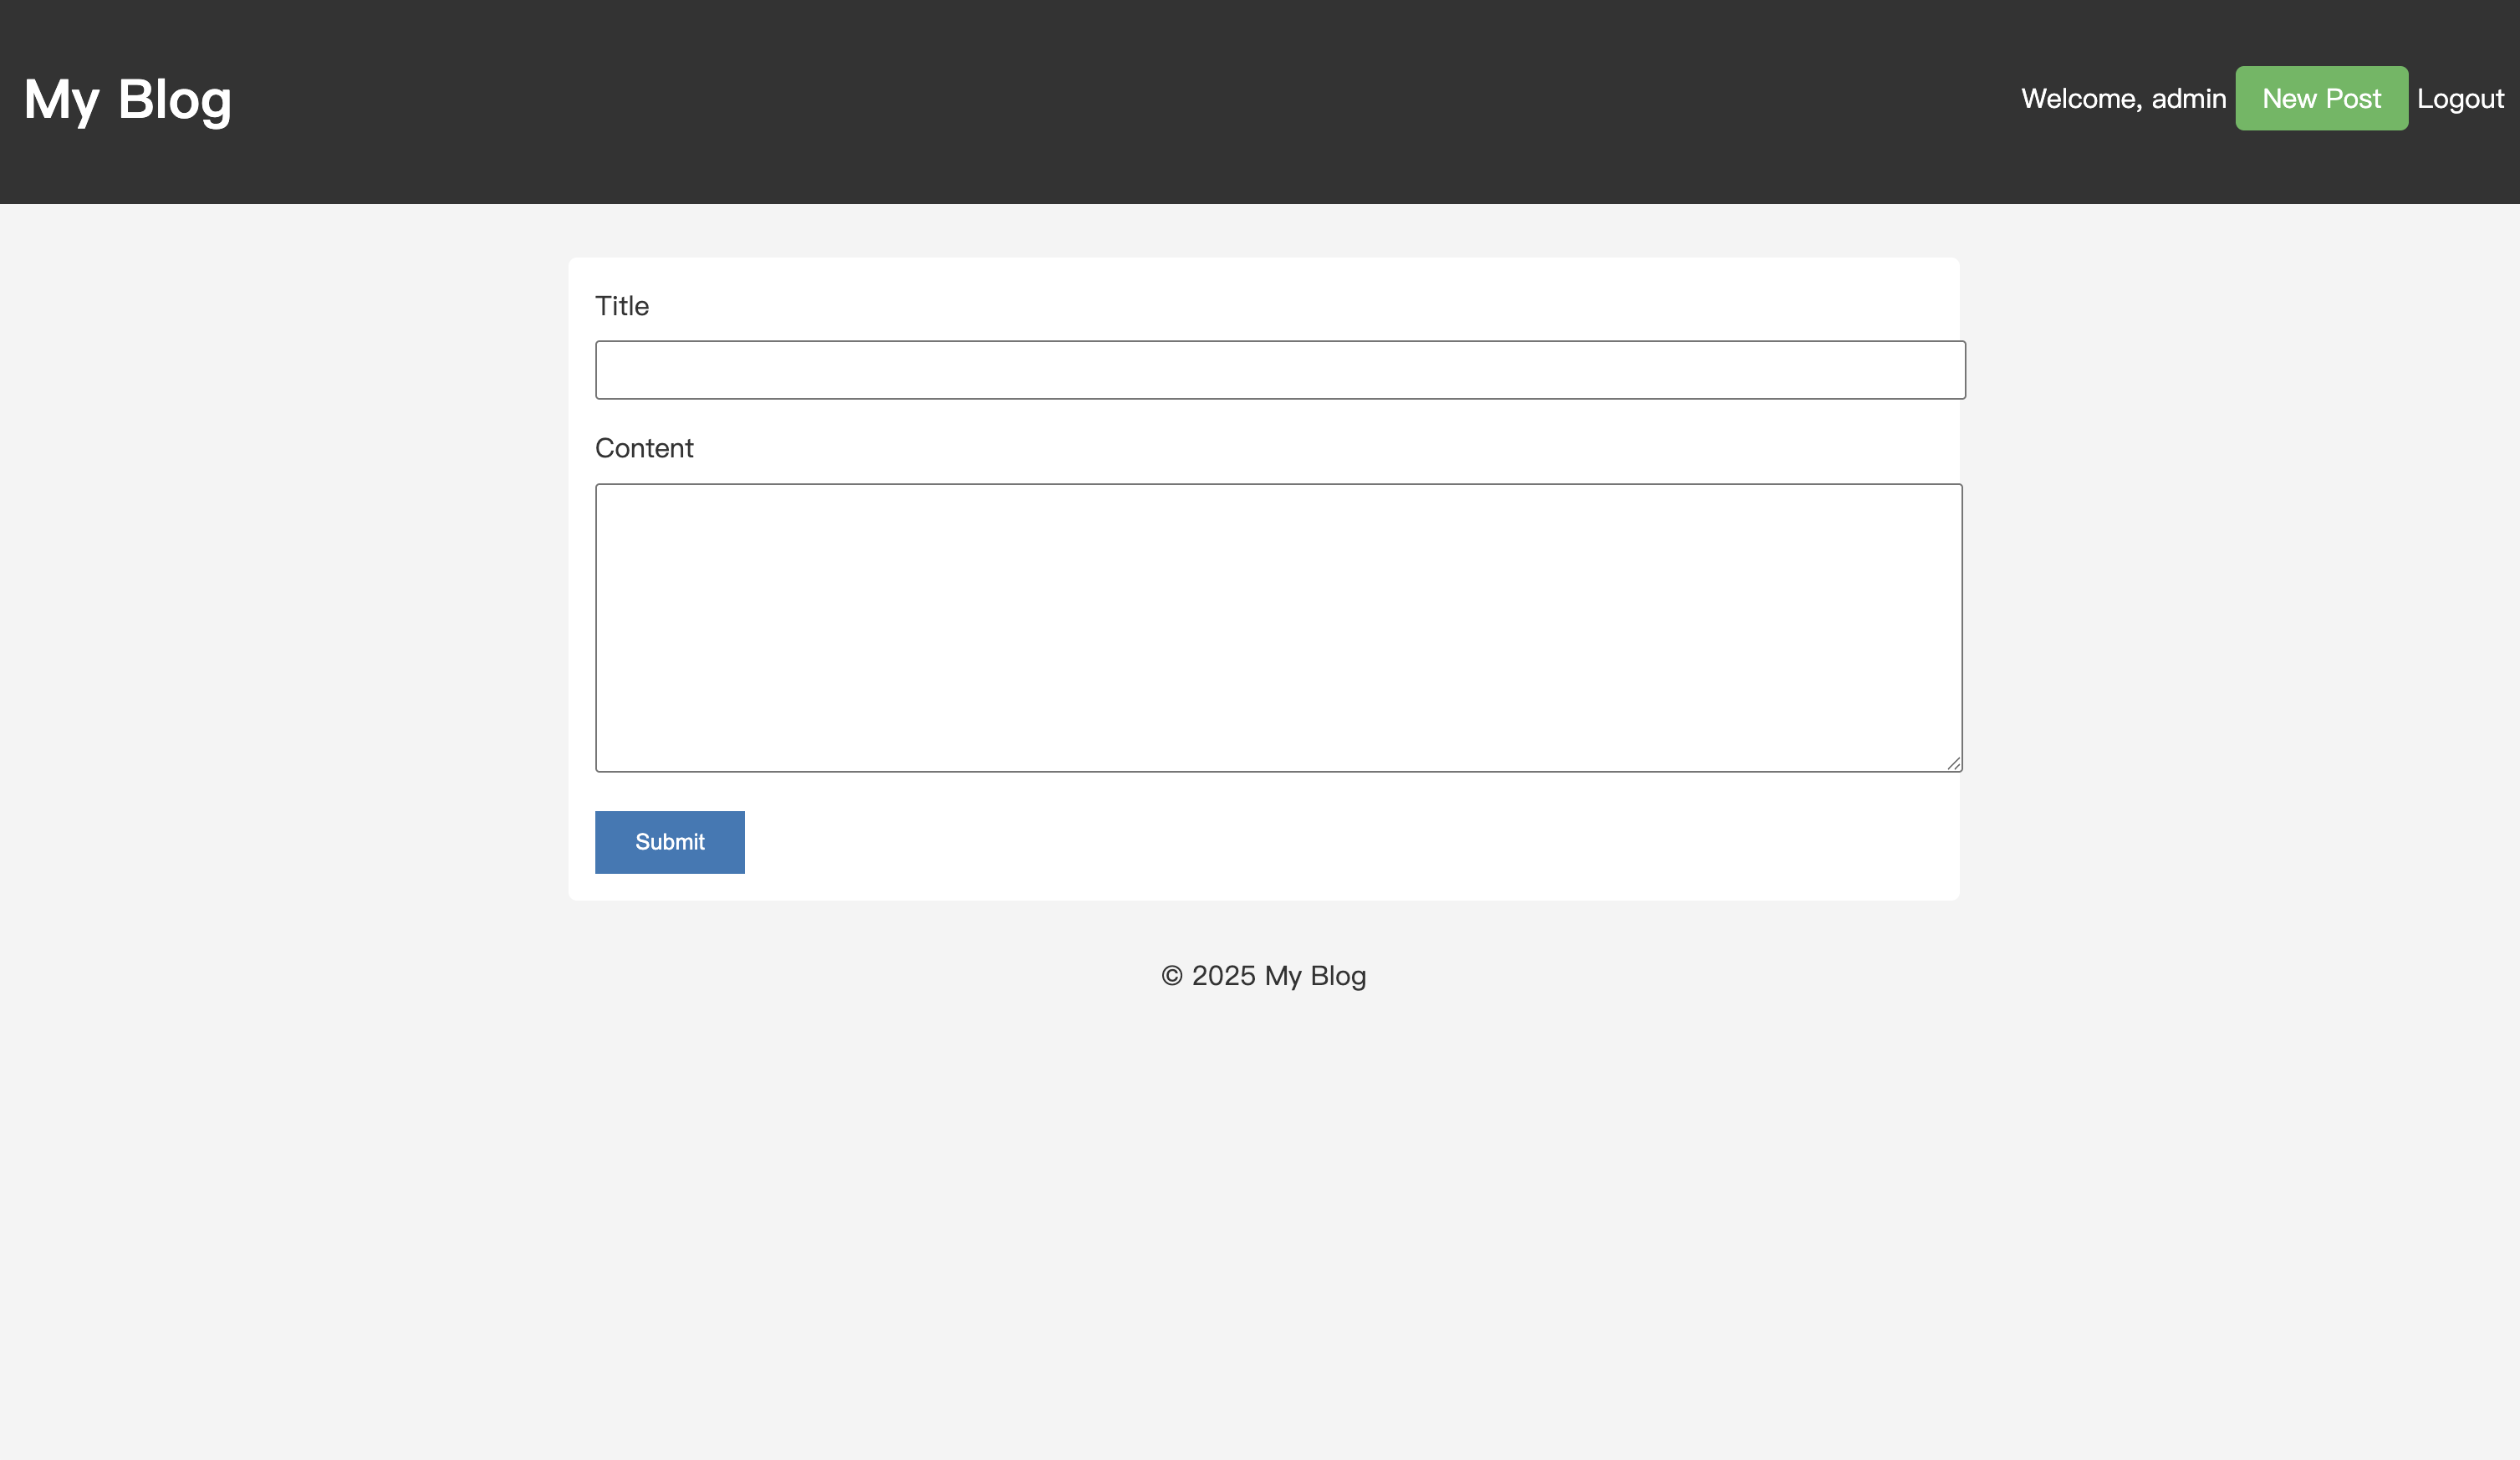
You can now click "New Post" to create a new article. If you log out and then try to visit /posts/new, you will be blocked.
With that, we've added a complete user authentication system to our blog. No more worrying about friends messing with your posts!
Further Practice
We've manually implemented an authentication system using express-session.
However, in real-world scenarios, you often have more complex authentication needs, such as logging in via third-party accounts like Google, GitHub, etc. In such cases, consider using a more mature authentication library like Passport.js to handle login and authorization.
If you're interested, try refactoring the project's login authorization using Passport.js!
Previous Tutorials: